TFS though a good product lack a lot of administration UI. Typically this is not a characteristic of a Microsoft product. When I first installed and started using TFS I went around searching for any administration console on the server which is more common for a Microsoft product but could not find one. Then I thought maybe there is web based administration service again no luck.
So basically what we have is Team Client which is the administration tool for managing TFS. Even this tool does not covers all the administration task. So administering TFS is pain for administrators. But after searching on Google I came across several good tools which can be used to make an administrators job easy. CodePlex is a good place to lookup tools for any Microsoft related technology.
TFS has three layers (Core TFS Service, SharePoint and Reporting), if TFS is only used as Source Control then you are only using Core services. But if TFS is actively used as a tool assisting the process automation then probably you might end up using all three layers. So administrators are responsible to manage all these three layers independently. There is no one console which can manage all these layers. Also you need to have knowledge and expertise on the technologies such as SharePoint and SQL Reporting Services.
Now if we have to add a new user to TFS then he has to have rights on all three layers. Using Team explorer you can only setup user permission on Core Services and not on SharePoint, Reporting Services. You need to setup permissions for the same user on respective layers using different consoles. You also need to know how the security is implemented for each of these layers and what level of right you need to grant to user. This seems to be a daunting task isn’t it?
I came across a small tool which will make thing easy for you and you can manage these layers from this single console. The utility is called Team Foundation Server Administration Tool which is CodePlex project and can be downloaded from here.
Installation is no-brainer. Following is how can the tool be used
- Start the tool from start menu
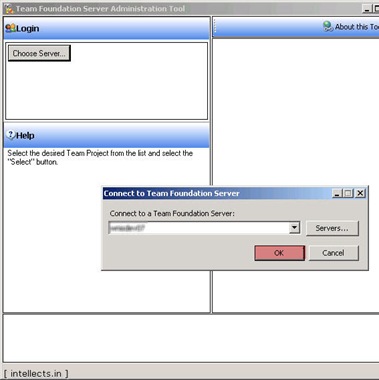
- Once the tool is loaded, it will ask you to select the server (The server list is populated if you have already setup TFS connectivity using Team Explorer)
- Select the server and click on “OK“
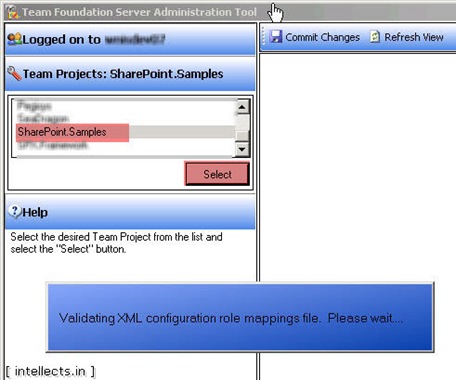
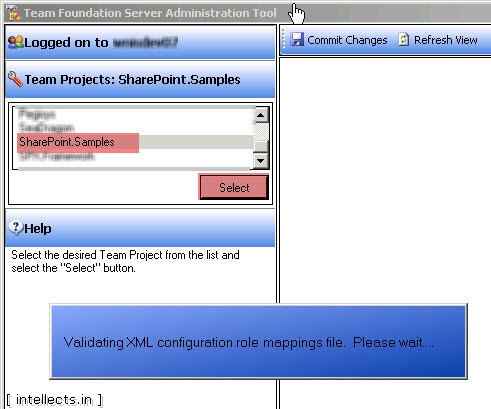
- The screen below show list of all project from the server which you selected
- Select the project and click on “Select“
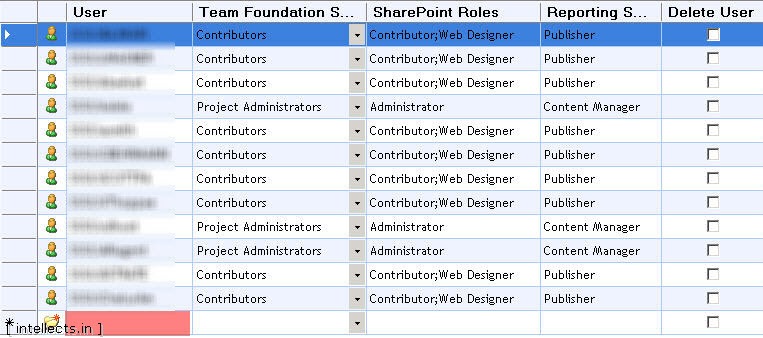
- After you select the project, the screen will load information for users having access to the project on all three layers of TFS
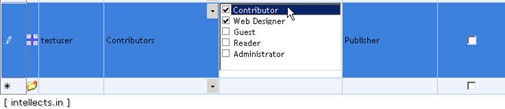
- To add new user go to the bottom of the list and enter the new user name next to the folder icon in yellow (highlighted in the image)
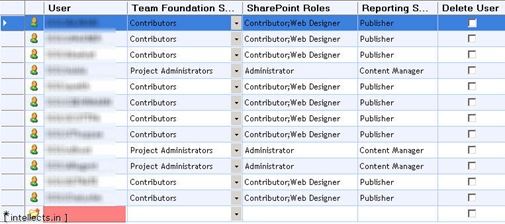
- After entering the user name select the role user is having in TFS, based on his role in TFS, roles are automatically selected for other two layers (SharePoint and Reporting)
- There are four role for TFS which are self explanatory. This is not the right place to discuss about what does these roles do. You can refer the TFS guide or help.
- If you have setup custom groups in TFS and other layers you can map the same in this tool using and XML file which is located at “C:\Program Files\Power Toys for Visual Studio\TFS Administration Tool\RoleConfig.xml” (this is the default installation location, adjust as per you installation)

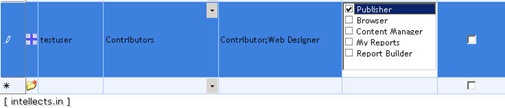
- Image below shows various roles available for user on SharePoint layer of TFS
- After selecting role for TFS as “Contributors“, the default role for SharePoint is mapped as “Contributor” and “Web Designer” this can be changed as per the requirement or in fact if you want, remove all the check marks and he will not be granted access to SharePoint.
- Logically these mapping of roles between layers is well thought of and would not require changes in most cases
- Image below shows the various roles available for Reporting Services Layer which as said above can be adjusted as per requirement
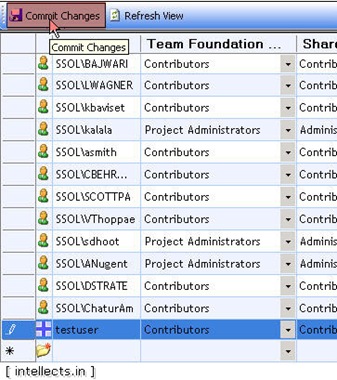
- Once you have added the user commit the changes back to server by clicking on “Commit Changes” which is on top of the window.
- Watch the log at bottom for any error.


This is all about the user permissions. If you happen to use Team System Web Access (TSWA) then you need to add the user to local NT security group called “Tswa Users” on TFS Server where the Team System Web Access is loaded. Use the following command to add user to the local group
- net localgroup “Tswa Users” <UserID> /add
2 replies on “TFS Tools and Utilities – Part I : User Permissions”
Is this tool supported on TFS 2008?
Yes it works with TFS 2008. I am using this with TFS 2008 currently.