Welcome to second post in series “TFS 2005 Customize Work Item Template and Process Template” I hope you have found my first post to be useful and by now you would have figured out the way to do various customization for TFS using the Power Tools. But for those who are yet to try it this post will walk you through the process.
Customizing the Work Item Tracking (WIT) Template
Changing work item templates, when new to team foundation server seems quite daunting – the first things I needed to learn about changing the work item templates were the witimport and witexport commands – these allow the import and export of XML definitions for work items on an existing project via the command line and editing the xml by hand was fiddly to say the least.
As said earlier TFS Power Tools makes this very simple by visually representing the XML for editing. The layout presented for editing the template look like a form layout which is quiet easy to work with.
Recently I had to modify the default Work Item templates for type Task to include a new custom field and also we needed to make the Task Start Date and Task Finish Date to be editable. The fields are editable in Database but are locked only in the UI. So we only have to make changes in the UI.
The reason these filed are read only is to prevent users modifying the dates. Often the tasks are loaded/imported from a MS Project Plan (.mpp) which has the Start Date and Finish Date along with dependencies and milestones. The effect of changing the date might change dates for other dependent task(s). MS Project can handle this, but when the date is modified in TFS Work Item and its synchronized with MS Project Plan the MPP is screw-up as this will not change the dependent tasks.
Now lets get the real action started, first I will show you how to make the Task Start Date and Task Finish date editable.
1. Making Task Start Date and Task Finish Date to be editable
- Open Visual Studio (if not already open)
- Open Team Explorer Window (Ctrl+\, Ctrl+M) (if not already open)
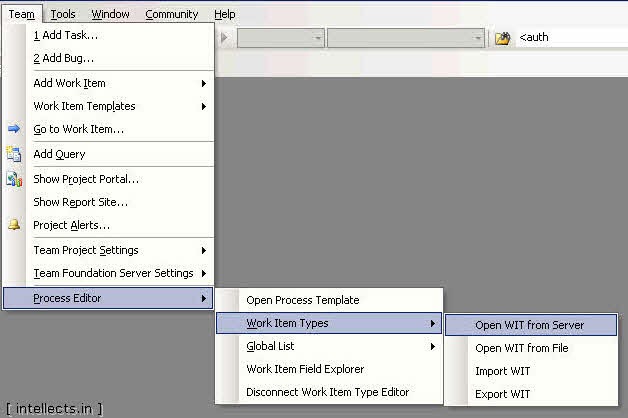
- From VS Menu click “Team” > “Process Editor” > “Work Item Types” > “Open WIT from Server” (Caution: You will be modifying this directly on the TFS Server so try to do it on Test Server rather than a production server)

- Enter your server details and press “Connect”

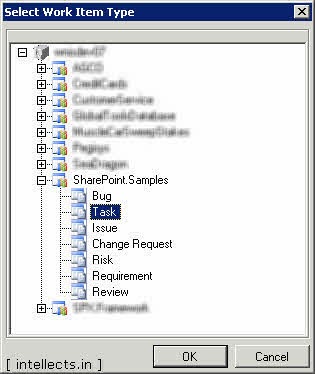
- You will now see all the projects in TFS, Select the Project and then expand it to select the work item type you want to edit Task for this post and click “OK”
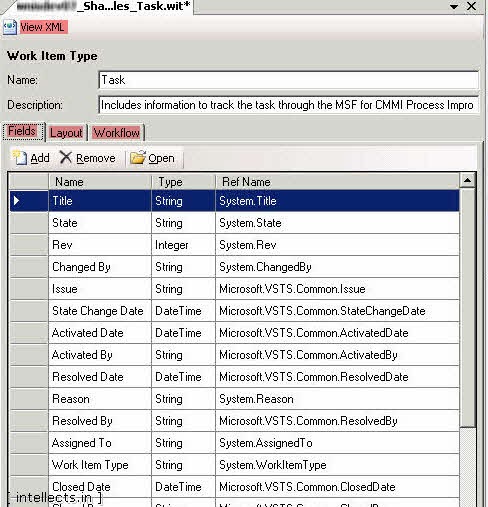
- You will see the screen similar to the one below, this is where you will be modifying the template. There are three tabs: Fields, Layout and Workflow. Fields Tab handles everything about the data/entity, Layout handles the rendering and view, Workflow defines how the data is transformed. You can also view the XML by clicking on View XML

- As discussed earlier the fields Task Start Date and Task Finish Date are read-only in UI we will go to the Layout tab in order to make them editable.
- Click tab “Layout“
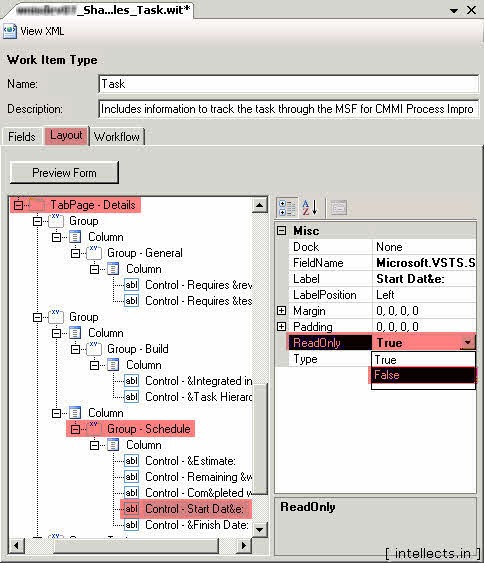
- Scroll down to locate “Control – Start Dat&e:“, which is under “TabPage – Details” > “Group” > “Column” > “Group – Schedule“
- Now in the properties for the control on right side of window select the property “ReadOnly” change the value to “False“
- Repeat the step above to change property “ReadOnly” to “False” for “Control – &Finish Date:“
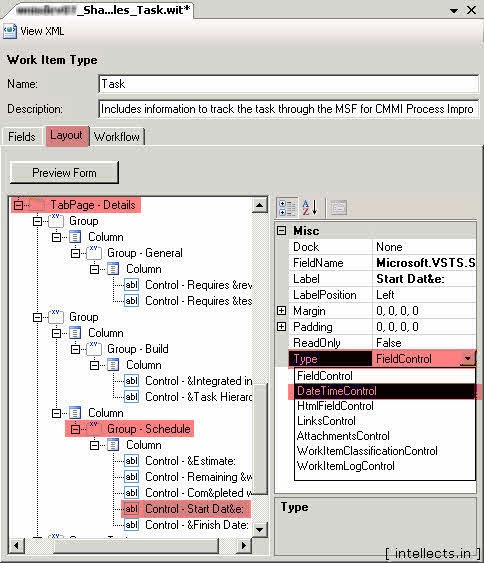
- Now we need to change the type of control so that it will be rendered with standard date time control which we can use to select the date
- On the properties pane of “Control – Start Dat&e:” select the property “Type” and change value from “FieldControl” to “DateTimeControl”
- Repeat the step above to change the property “Type” for “Control – &Finish Date:” to “DateTimeControl“
- Save the changes Ctrl+S or File > “Save <ServerName>_<ProjectName>_Task.wit“
- After saving the changes refresh the project from Team Explorer, wait for some time after refresh and try to refresh couple of times and have some wait time between the refresh.
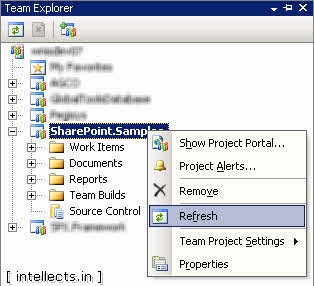
- Open “Team Explorer” > Right click on the Project “SharePoint.Samples” > “Refresh”

- To verify the changes now you should create a new task
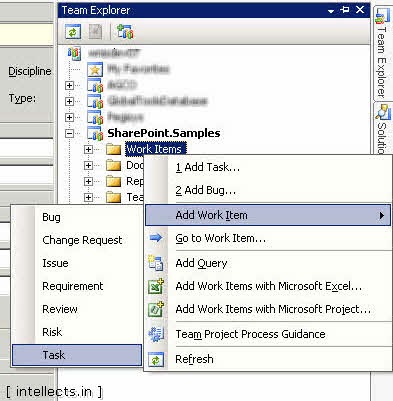
- Open “Team Explorer” > Expand the project “SharePoint.Samples” > Right click “Work Items” > “Add Work Item” > “Task”

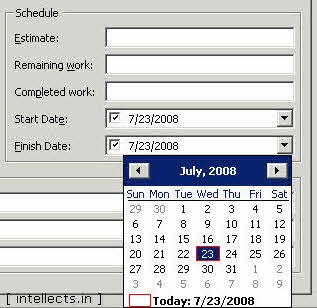
- Once the new task form is open, switch to “Details” tab and you should see your changes as per the image below


2. Adding custom field to Work Item Tracking Template “Task”
- I would assume that you already have the template open or know how to open it from the server for type “Task” in project “SharePoint.Samples” (follow instruction on top to open the template)
- We would add a drop-down with options and make this field mandatory
- Switch to tab “Fields” and click “Add“
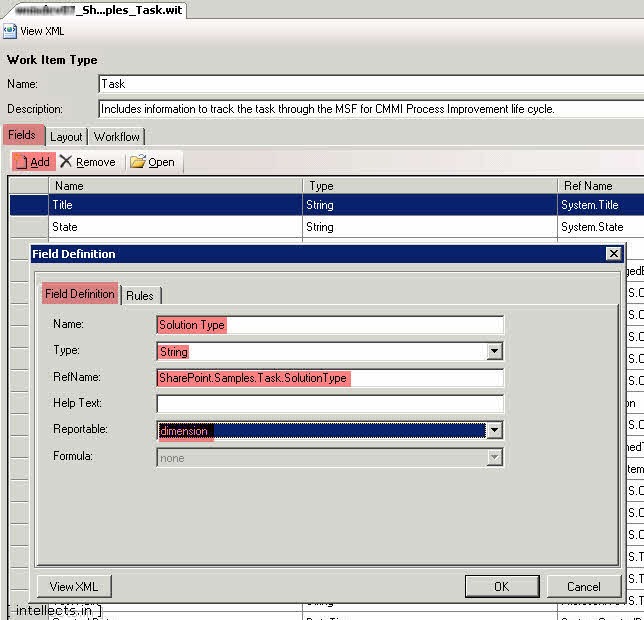
- We are naming the new Field as “Solution Type” in tab “Field Definition” enter the detail as highlighted in the image below (Name : Solution Type | Type : String | RefName : SharePoint.Samples.Task.SolutionType | Reportable : dimension )

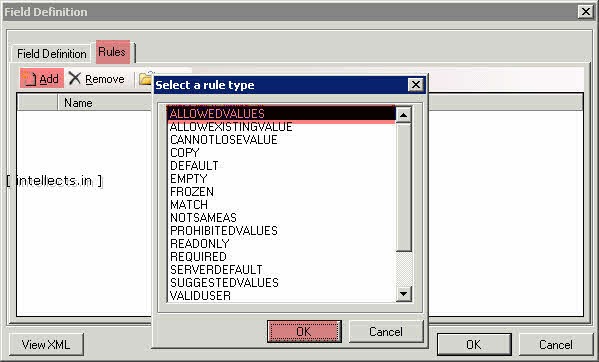
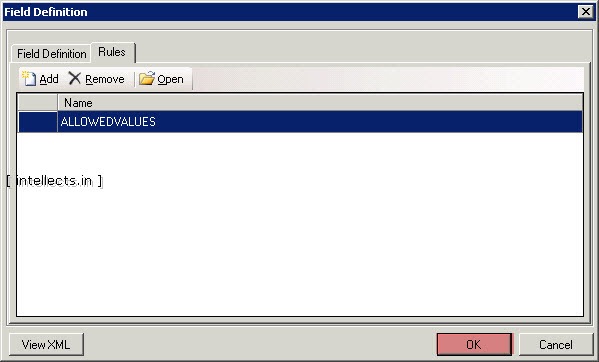
- How do we make it a drop-down? Now change the tab to “Rules“
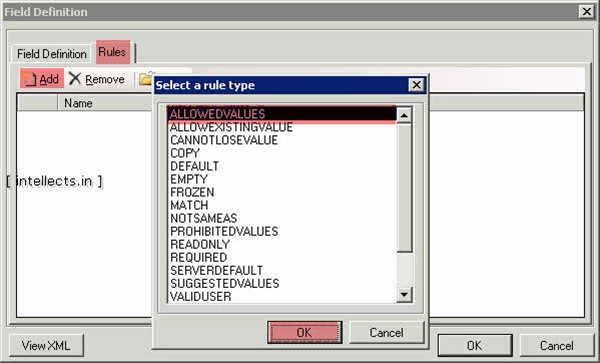
- Click on “Add” and new window “Select a rule type” will popup
- Select “ALLOWEDVALUES” which should be the first in list and click “OK“
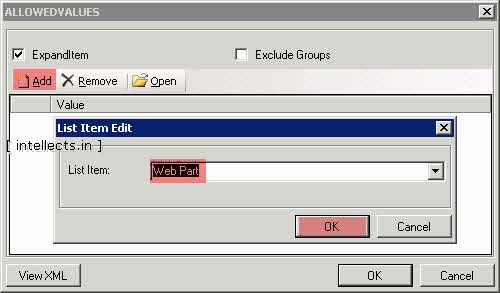
- In window “ALLOWEDVALUES” click on “Add“
- In window “List Item Edit” add the value “Web Part” in “List Item” on click “OK”
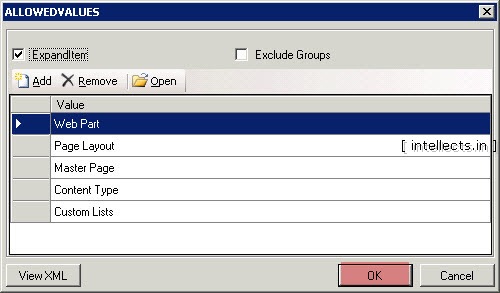
- Repeat two step above to add the following values “Page Layout“, “Master Page“, “Content Type“, “Custom Lists“
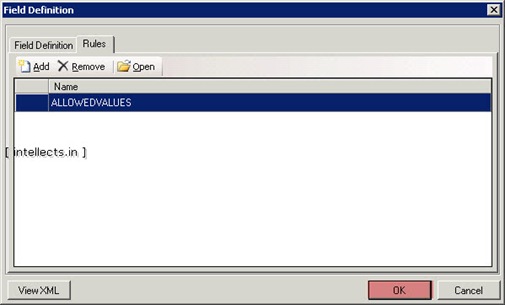
- When you have added all the value in window “ALLOWEDVALUES” click “OK”
- Click “OK” in window “Field Definition”
- Now we need to add this field to the form (UI) so that people can start using it
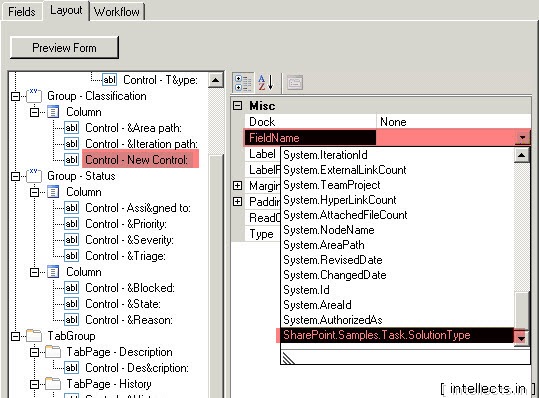
- Switch to the tab “Layout” and locate “Group – Classification” underneath this right click on “Column” and click on “New Control”

- Now edit the properties of control form the properties pane on right side of window
- Change the property for “FieldName” and select “SharePoint.Samples.Task.Solution.Type” from the drop down (this it the custom field which we just created)
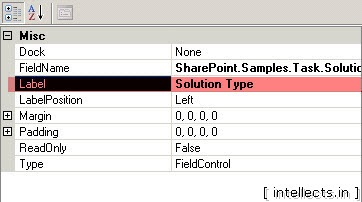
- Change the property “Label” to “Solution Type“
- Leave all other property values to default for this control
- Now we have to make this value as Required (Mandatory) while new Task is created
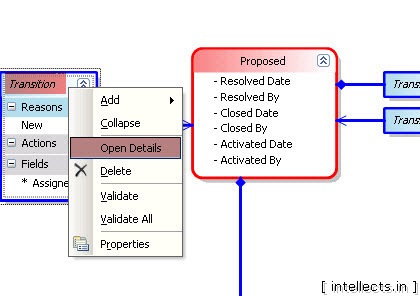
- Switch to tab “Workflow“
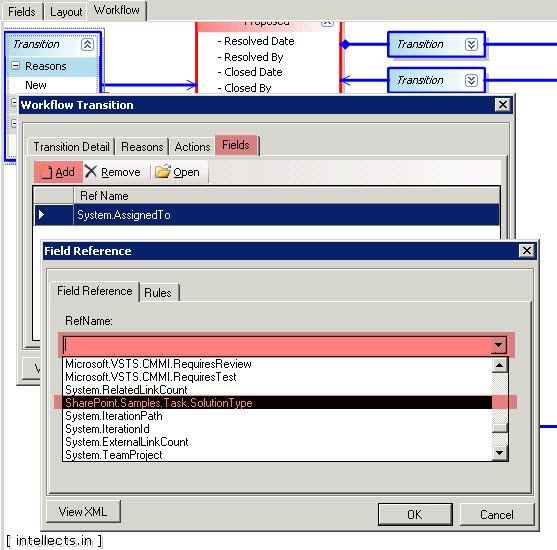
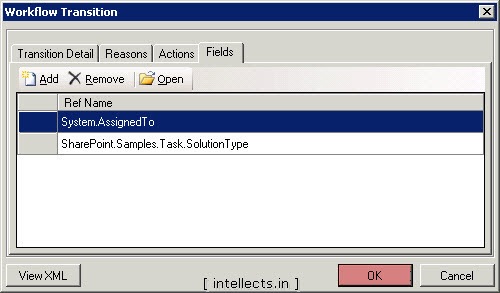
- Right click on “Transition” (first blue box) and click on “Open Details”

- In window “Workflow Transition” switch to tab “Fields” and click on “Add“
- In window “Field Reference” select value for “RefName:“
- Select “SharePoint.Samples.Task.SolutionType” from drop down and click “OK“
- In window “Field Reference” switch to tab “Rules” and click on “Add“
- In window “Select a rule type” select “REQUIRED” and click on “OK”
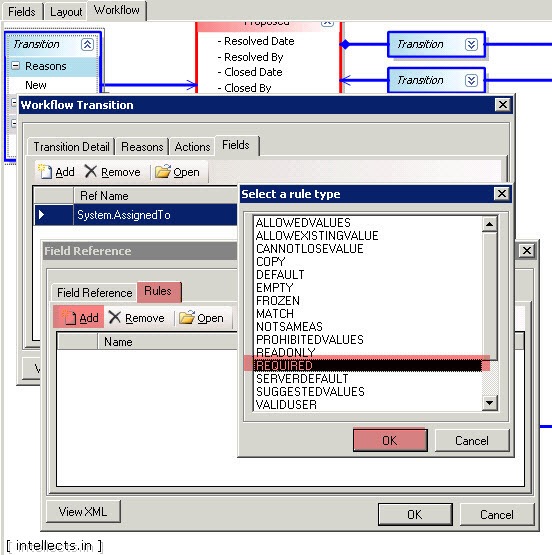
- In window “REQUIRED” click on “OK“

- In window “Field Reference” press “OK”

- In window “Workflow Transition” click on “OK”
- Now save the changes to template by “Ctrl+S“
- After saving the changes refresh the project from Team Explorer, wait for some time after refresh and try to refresh couple of times and have some wait time between the refresh.
- Open “Team Explorer” > Right click on the Project “SharePoint.Samples” > “Refresh”
- To verify the changes now you should create a new task
- Open “Team Explorer” > Expand the project “SharePoint.Samples” > Right click “Work Items” > “Add Work Item” > “Task”
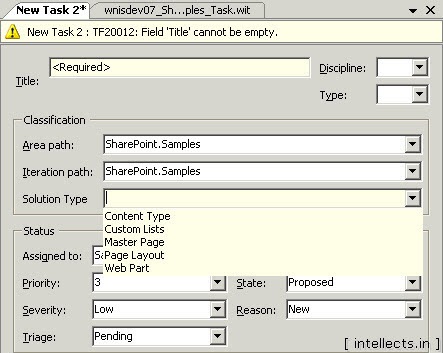
- Once the new task form is open, you should see your changes as per the image below, the filed is highlighted in yellow which denotes that this is required in order to create a new task


We are done!!
But what if we want to do this for all existing projects? Simple, we do export and import.
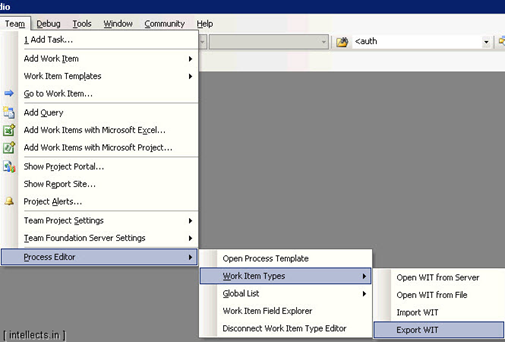
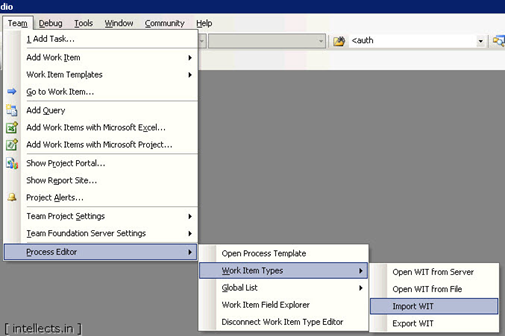
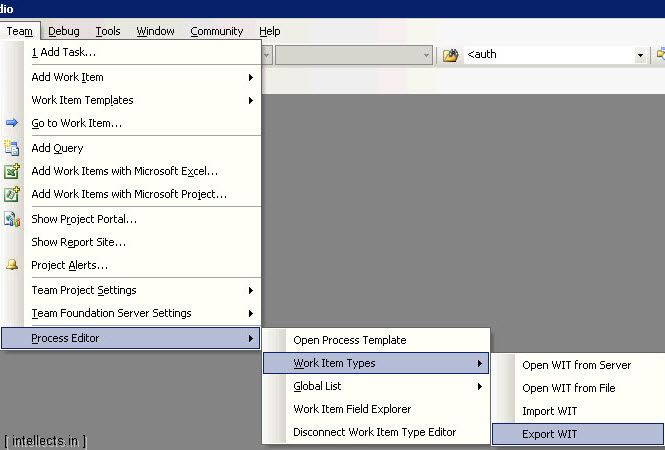
- From VS Menu click “Team” > “Process Editor” > “Work Item Types” > “Export WIT”
- Enter your server details and press “Connect”
- You will now see all the projects in TFS, Select the Project and then expand it to select the work item type you want to export “Task” for this post and click “OK”
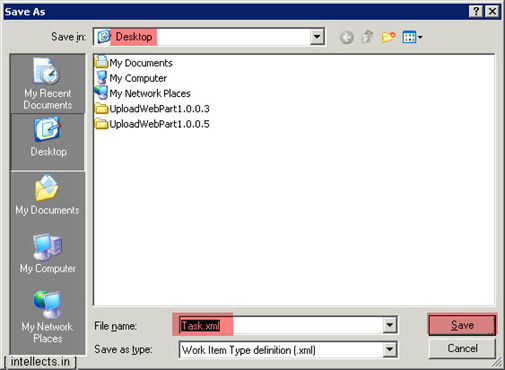
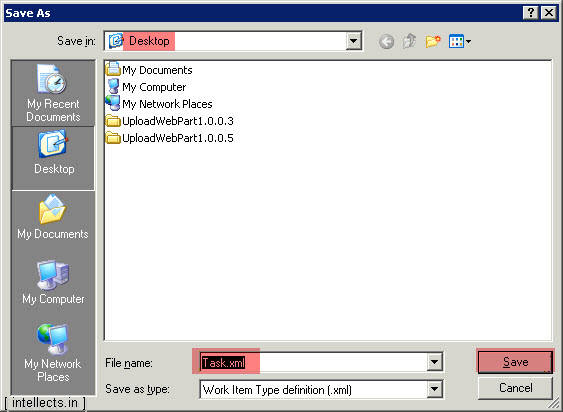
- You will see the “Save As” window, browse to the location where you want to save, name the file and click “Save”
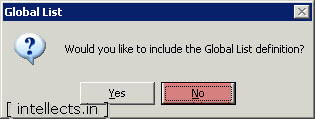
- If you get popup window “Global List” asking “Would you like to include the Global List Definition?” click on “NO”
- From VS Menu click “Team” > “Process Editor” > “Work Item Types” > “Import WIT”
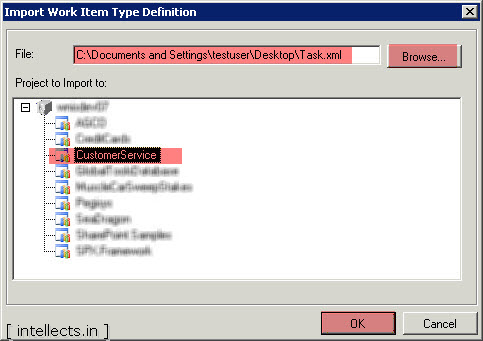
- In window “Import Work Item Type Definition“
- Click on “Browse…” and locate the file which you saved earlier during “Export WIT“
- Select the project to which you want to apply this template “CustomerService“
- Click on “OK”
- Its done, now to verify do as we did couple of time before, refresh the project “CustomerService” and then create the new task. You should see your changes applied.


Now what if we want this template to be there automatically when we create a new project using the “New Project” wizard in TFS?
Also how can we have some default document templates to be there in each project we create?
How to create some default task when new project is created or rather how can we stop TFS from creating these default task with every new project?
Everything is possible, and this should have given you enough food for thought and I am sure you can be more creative and use this in a better way.
I will be answering all of the above question in TFS 2005 Customize Work Item Template and Process Template – Part III of this series.
Link to other posts in series:
2 replies on “TFS 2005 Customize Work Item Template and Process Template – Part II”
Very good post, I want to know how to create the user data field type, like the SharePoint.Samples.Task.SolutionType, i guess this It’s taking from the SharePonint that is all ready installed, but if i want to create a data field type named Company.Field.Type
What are the steps to do that ?
[…] TFS 2005 Customize Work Item Template and Process Template […]